Friday, 16 December 2011

Thirsty Work.....

Beer Can 3
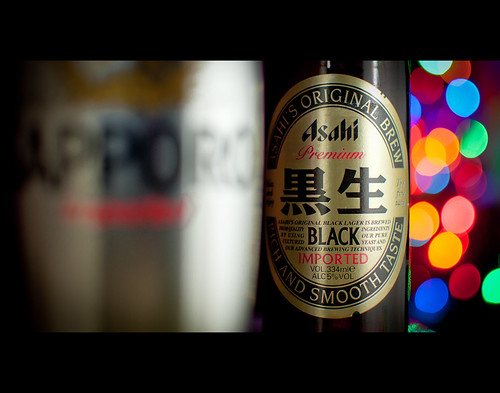
I felt all Christmassy today, what with just a week or so to go. The tree is up and the fairy lights are glowing so what better way to complement these festive accoutrements than to photograph them with the essence of crimbo, beer!!...

...Actually, it's a shot for an on-going Flickr project about a beer can I bought and this is the latest in the series - click through to read the hows and whys.....

Thursday, 15 December 2011

Two become one....

I've been light painting like mad, partly because it's my new 'fad', but also because the weather has turned and outdoor features have been cancelled or just not booked due to rubbish fishing conditions. So I've been drafted in to help out with studio shooting for our advert production department.

There were some rods in for photography that would run in a corporate style advert for one of our retailer who has an in-house brand. It's a nice position to be in when you're asked to help out a key advertiser who's going places in what is currently a hard market to be in, recession and all that. Plus, it helps to remind people that I'm not just good for shooting outdoors!..

The ad team needed a single shot as the advert's main image and they'd already tried shooting against white but didn't like the result. So I suggested black background they went with it because it fitted with that slicker, corporate feel they wanted to get over in the advert.


So the shot started off with a bit of light painting using my trusty phone screen. exposure was 25sec at f/8. The length of the shutter speed allowed me to make sure I covered enough of the graphic, and the aperture made sure there was good sharpness. The client wanted it to run over a full DPS and it was decided that the whole graphic needed to be sharp, so shallow DoF was out of the question.

This was the best of three shots; the other two had patchy lighting (where I'd hovered with the phone for too long in one spot) and just didn't quite look right in terms of the way the light pool fell off. I outputted through Lightroom 3 into Photoshop to get it ready for the second layer, but not before cooling down the white balance so it would work well against the warmer light of the flash (original WB was 5500K, I changed it to 4400K).


So next was the shot using flash. I knew i needed a fairly strong highlight to left the top edge of the rod out from the black. Painting with the phone couldn't provide this because of the problems with a light source facing the lens (you get a ghosting of the screen moving) so i had to return to using flash. Of course, the beauty of merging shots is that as long as the camera stays put so the second image is identical in position, settings can change to allow flash on a much shorter exposure. I tried it on a long exposure, pressing the test fire button on my flash set to 1/64th power.

But it just didn't look right; it was hard to to move the flash along the blank without it being in shot and by doing it in bursts, I wasn't sure I'd nail a highlight that would authentic. In the end I settled for a flash out of shot set on a narrow beam, fired by a trigger with the camera on f/9 at half a second. The highlight isn't even because of light drop-off, but I don't mind that - it was easier to achieve it this way in one go. As you can see the highlight also catches some of the foam on the handle.


The merge was pretty simple; stack the layers in photoshop and just use a mask to 'uncover' the softer light pained shot. I did a fair bit of low opacity brushwork to avoid killing the highlight totally and finished off with a full selection (with a 150px feather) on the black areas before filling them with maximum black. This was to allow extension of the image using black to move it around the page so it could be shrunk.

The designer, Steve (a guy who's really getting into photography himself), was really happy with the result. I like it too, although I think there's so much more that can be done with mixing flash and painted light, and I think where highlights and rim lighting are concerned, it's the best way to attain a good result.


Tuesday, 6 December 2011

Want to win at this game? Always bet on black.....

Yeah, yeah, it's another naff title but it kind of sums up a part of my job as a photographer.

Aside from the location shoots, I have to do studio work for our various magazines, the majority of this type of photography relating to products that are sent in for testing.

My last post was about lightpainting and how I'd use it in a work situation but more than anything, that post spurred me on to thinking about efficiency and enjoyment. I love using flash but when you have limited resources and an even more limited studio space, actually setting up can be a nightmare. The number of times I've ended up just walking away, I've lost count. I suppose what I'm saying is if you're not enjoying the shoot when you should have full control, then things need to change.

Take today for example; I'd been out this morning doing a location shoot but got back to the office mid-afternoon. Pics were retouched and sorted. Anyway, after spending some time twiddling my thumbs I was asked at the 11th hour to get some rod shots done for a test that was going to press imminently.

Anyway, I pitched the idea of going away from shooting against white (my pet hate) and using a dominant background colour to isolate the product better so the product stood out. The rod had a red blank so I had to watch for clashing colours but my gut feeling in these situations is when I'm unsure and need a result quickly, a black background will always work.

I'll brush past the argument over which material is best (velvet or plexiglass/glass are my faves) but today I just grabbed the black cloth that was on the shelf and started from there. Time was of the essence today (I probably had 30 minutes all-told) but I knew that getting the flash heads set up would eat into that so I just elected to shoot 'sans' flash and rely on lightpainting, which is currently floating my boat.

I'm really getting familiar with doing this now. Tripod, manual focus, set camera to something long with a wide(ish) aperture and just paint away with my phone. I think I've been lucky with this so far, as I'm doing very few test shots to get my bearings. It could also be that I had an editor breathing down my neck from the other side of the studio curtain!


(ABOVE) This was one of three tests exposures, just to give myself an idea of how much 'painting' the shot needed.


With rod tests (and most other tests) we rely on a main image - usually the product in use outdoors - plus a selection, usually three or four, of close-up images that highlight certain key parts of the product. In this rod's case those were the reel seat, the guides, the graphics and the text showing its length and casting weight (how much it will cast at once). I'd quickly run over what was needed with the designer and editor and took it from there, doing composition on-the-fly but always remembering that they have to remain clear, illustrative photographs.

10 minutes in the studio and I was done. 10 minutes later on I was processing the images in ACR and 10 minute after that i was heading home to pick up the little 'un from the minder, happy that the magazine team were happy with the results.

My guess is that A) if I'd used flash I wouldn't have got things done in the time I had, and B) that if I'd shot against white the images wouldn't have had nowhere near as much impact. It might not be everyone's cup of tea, but black definitely paid off today....